

Step 1: Create the Plesk instance in AWS Lightsail
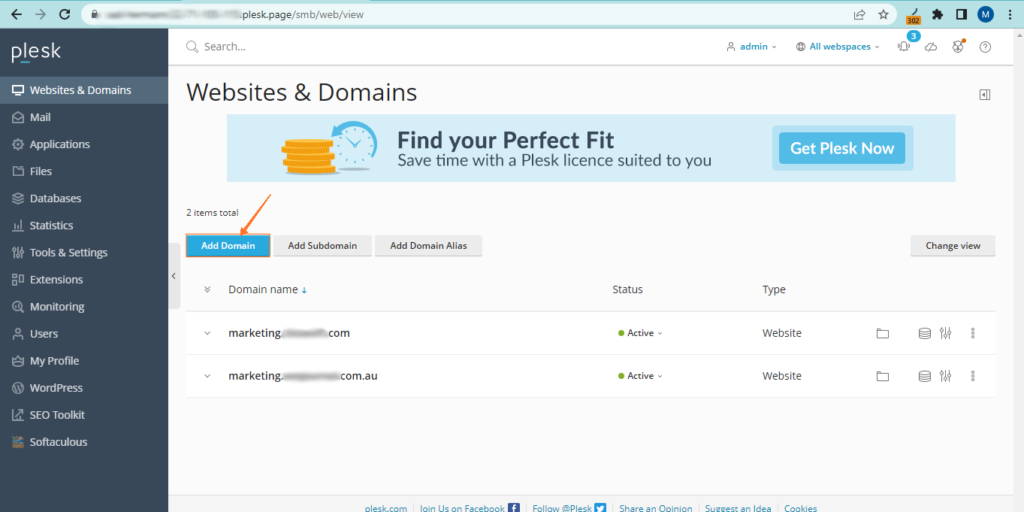
Step 2: Log in to Plesk and add the domain
- Add a new domain
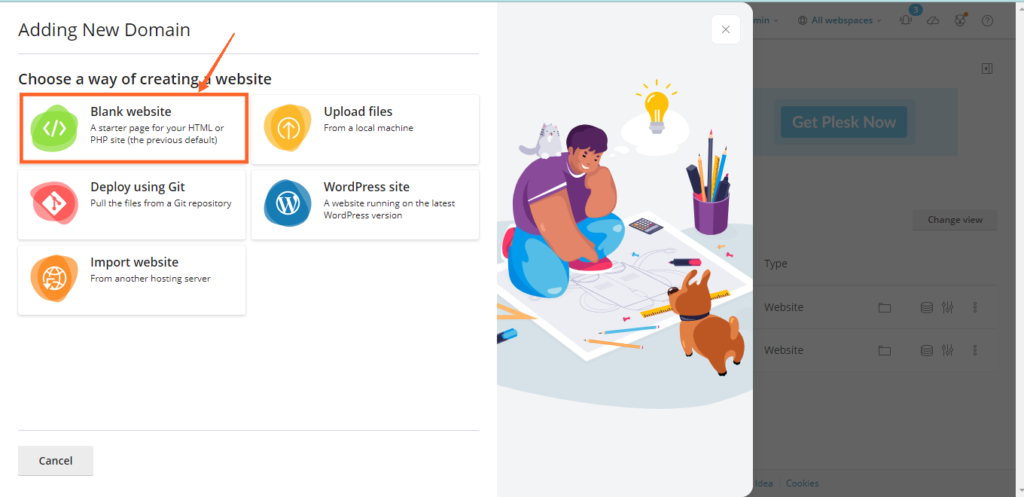
- Click on ‘Blank website’
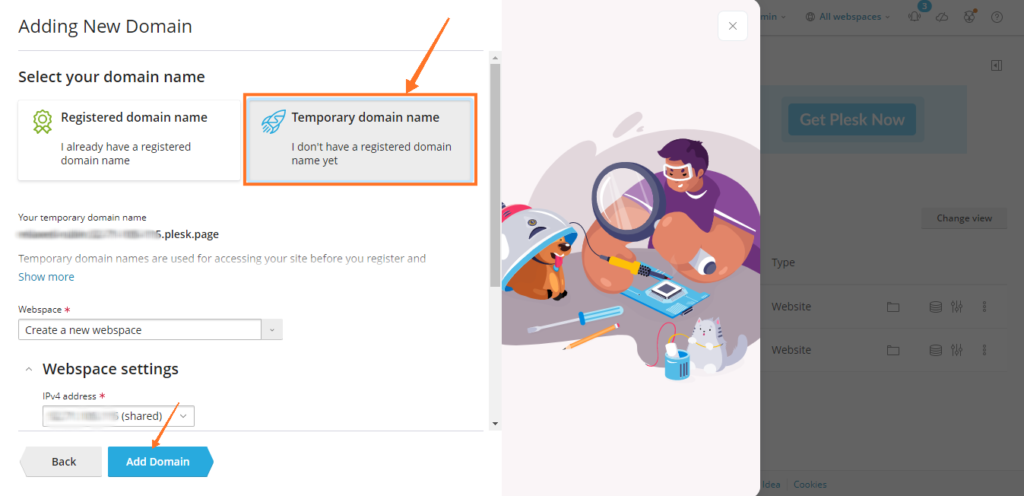
- Select Temporary domain name and click add domain
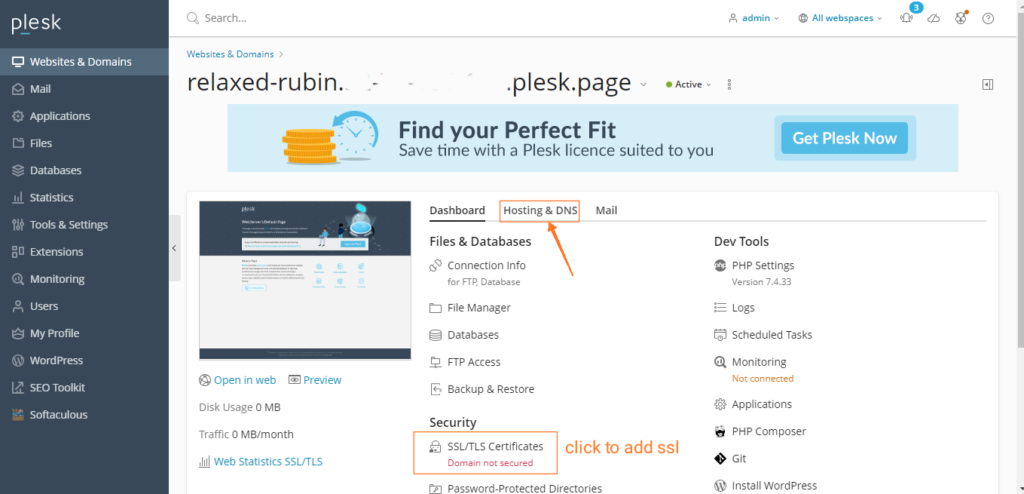
- After adding a domain with a temporary domain name you will see a page like this.
- Now click on Hosting and DNS
- we will add an SSL certificate later
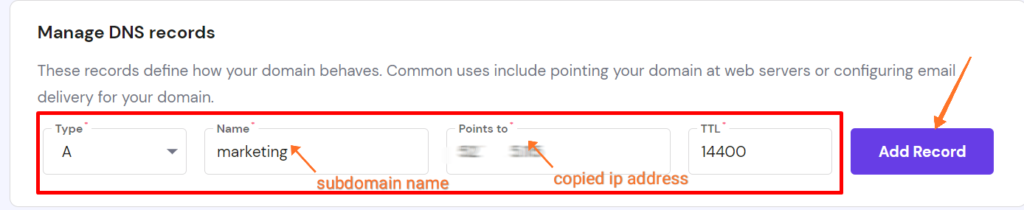
- The domain name will be like this if your marketing domain is ‘yourdomain.com’ then you can write ‘marketing.yourdomain.com’ or ‘mautic.yourdomain.com’ or as you wish

- Copy this IP address
- Add two ‘A’ type records to your Domain name provider.
- one for the subdomain ‘marketing’ and add another for ‘www.marketing’ with type ‘A’ and the same IP address
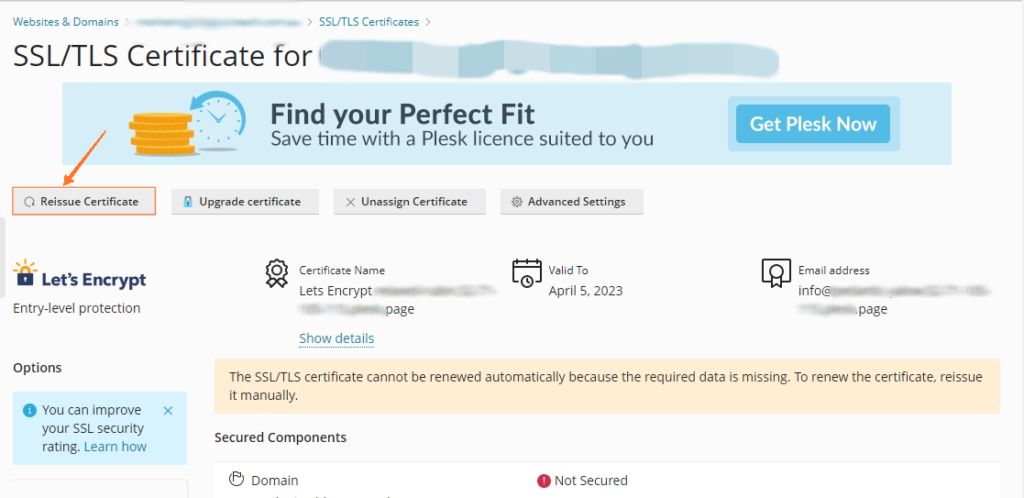
- Click on ‘SSL/TLS Certificates ‘
- Then click on Reissue Certificate
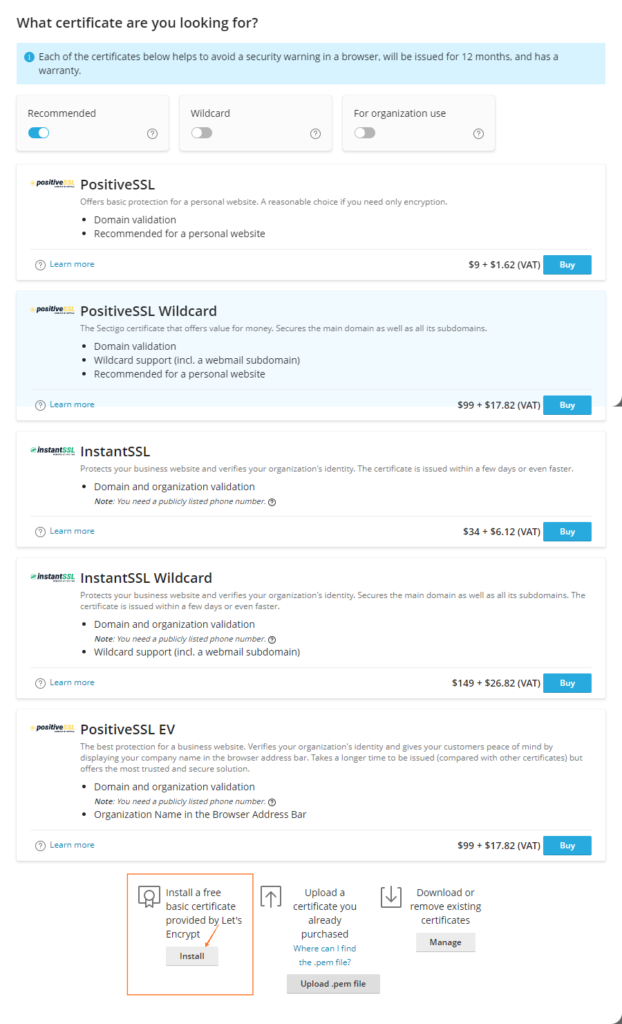
- Scroll down to the bottom and click install, this is a free SSL provided by Let’s Encrypt.
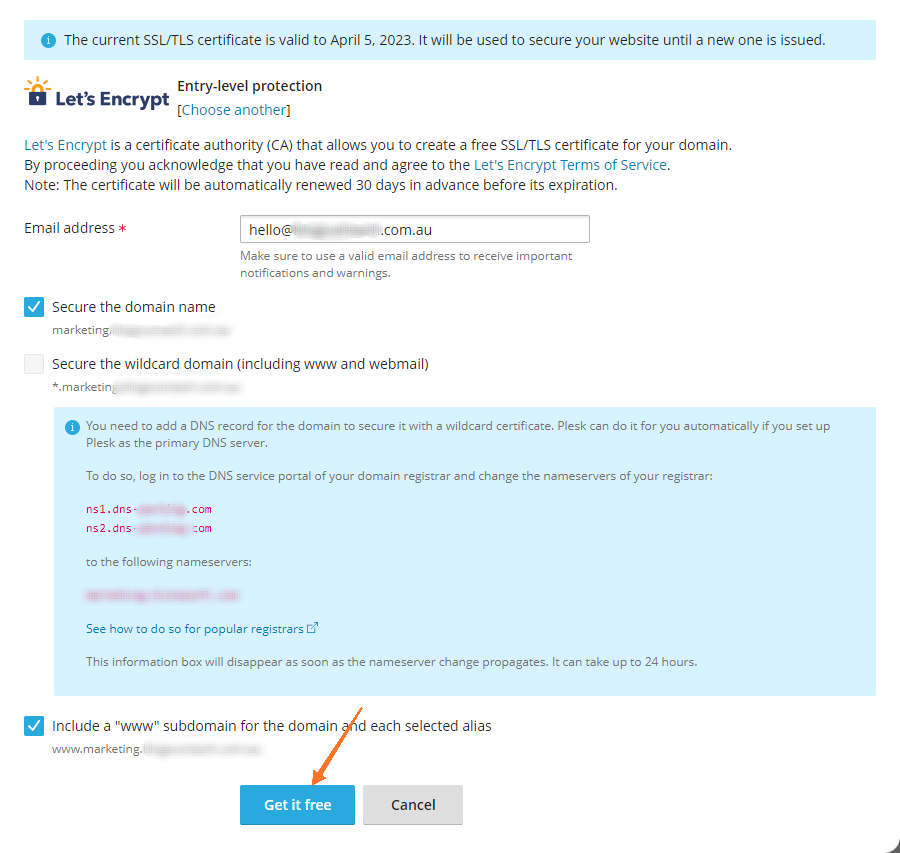
- Create a new email address using your domain name like ‘[email protected]’ and use this email here
- Then click ‘Get it free’
- After the successful installation of SSL, your domain will be secure.
Step 3: Install Mautic in your domain
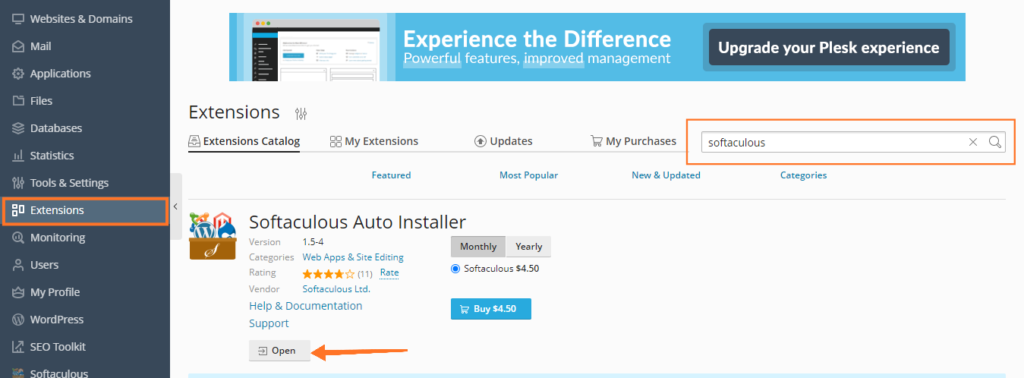
- In your plesk dashboard click on Extensions’ and then search for ‘Softaculous Auto Installer’
- click on open
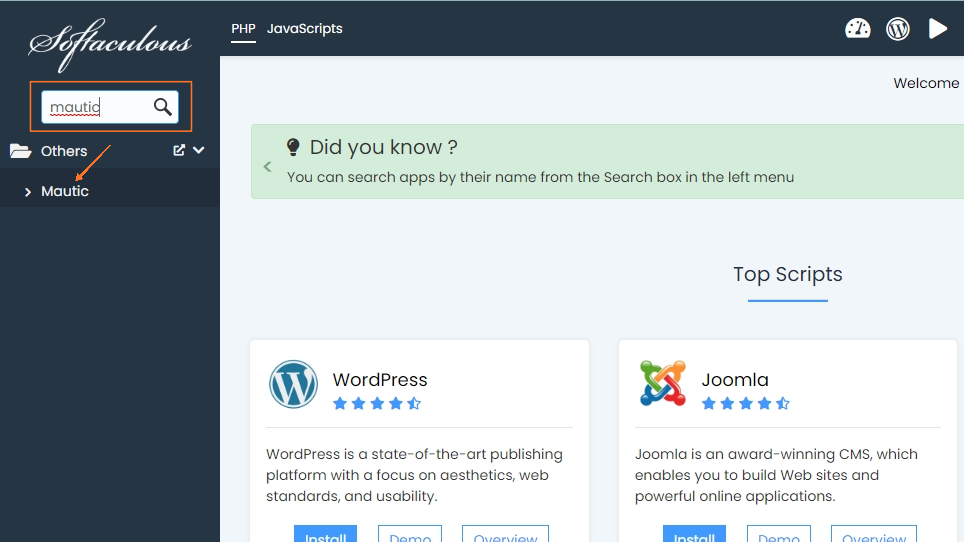
- After opening softaculos dashboard, search for ‘mautic’ and then click on Mautic
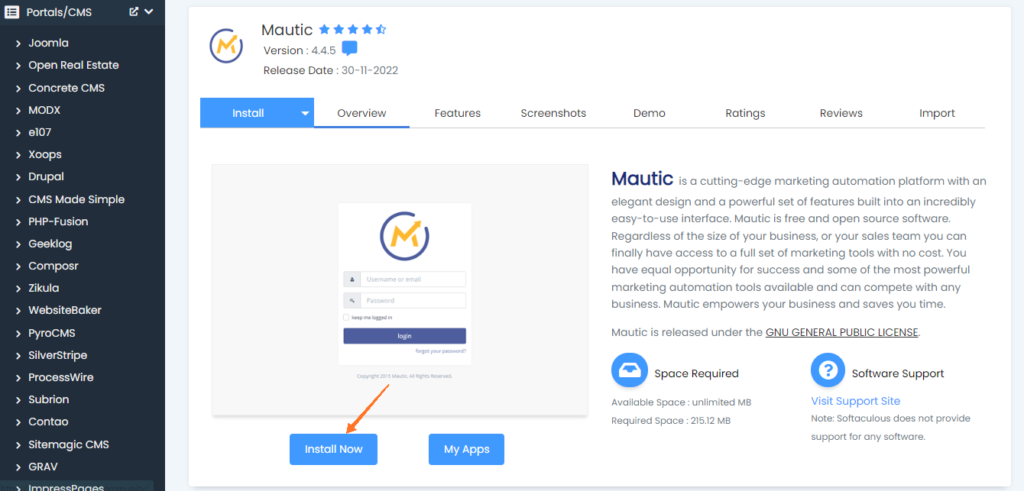
- After opening mautic click on ‘Install Now’
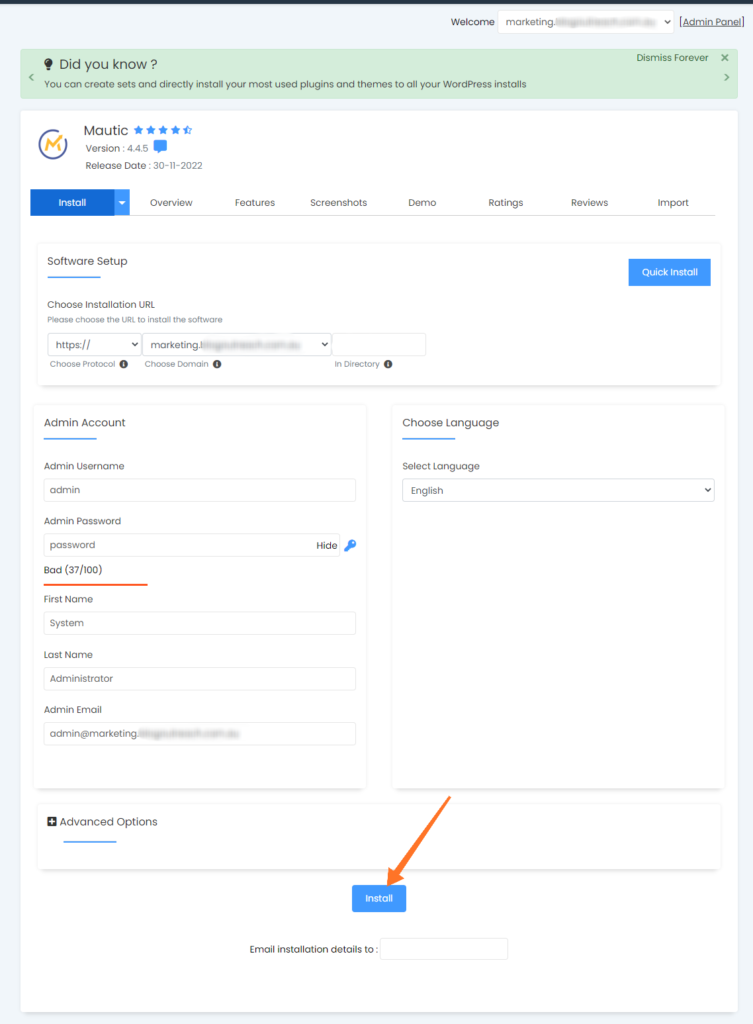
- After that give the installation URL like choose protocol ‘https://’ and choose Domain ‘marketing.yourdomain.com’ and in the directory field keep it blank.
- Fill the other necessary field as you wish and keep the admin username and password for use later.
- And then click “Install”
- After successful installations, you see like this.
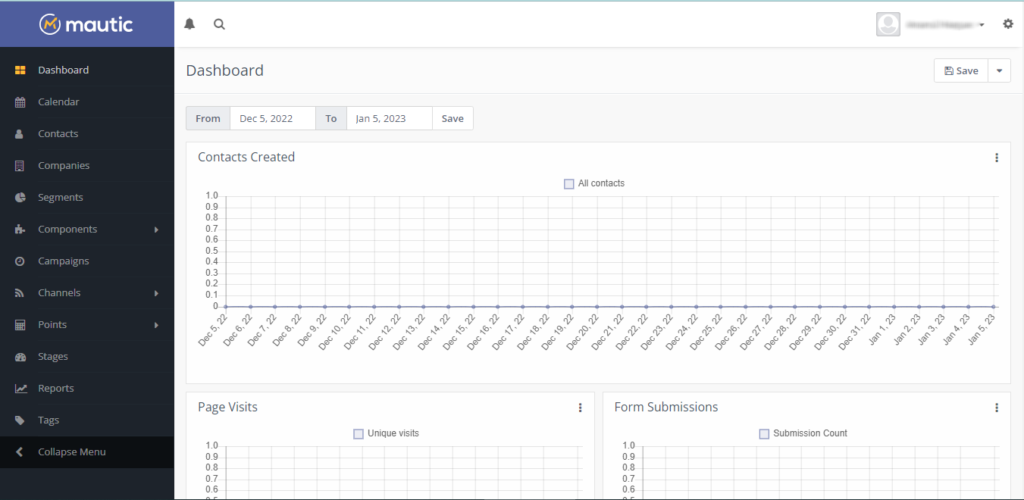
- And click on the administrative URL and log in to mautic and you will see your dashboard

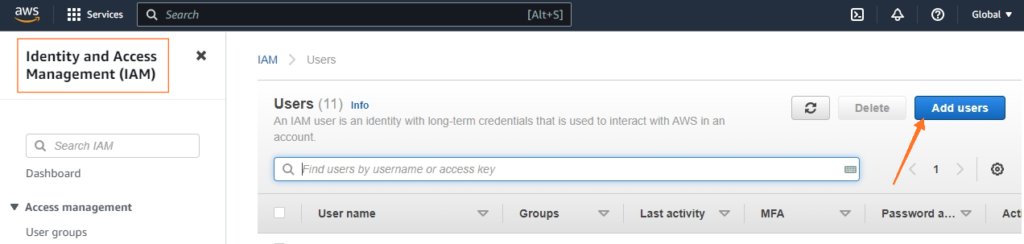
Step 4: Use AWS SES for email service
- Add a user to AWS Identity and Access Management
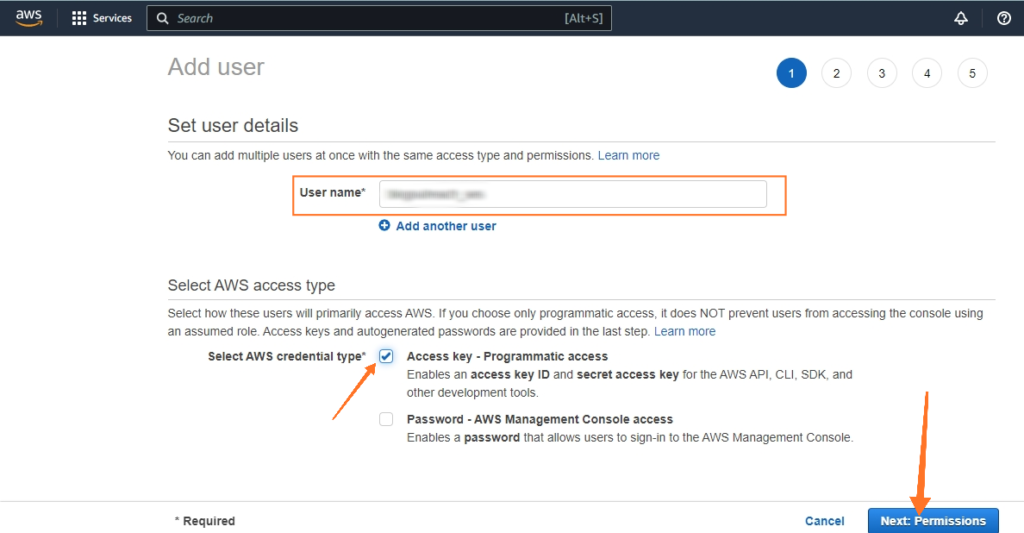
- Give a user name and select Access key – Programmatic access
- Click next
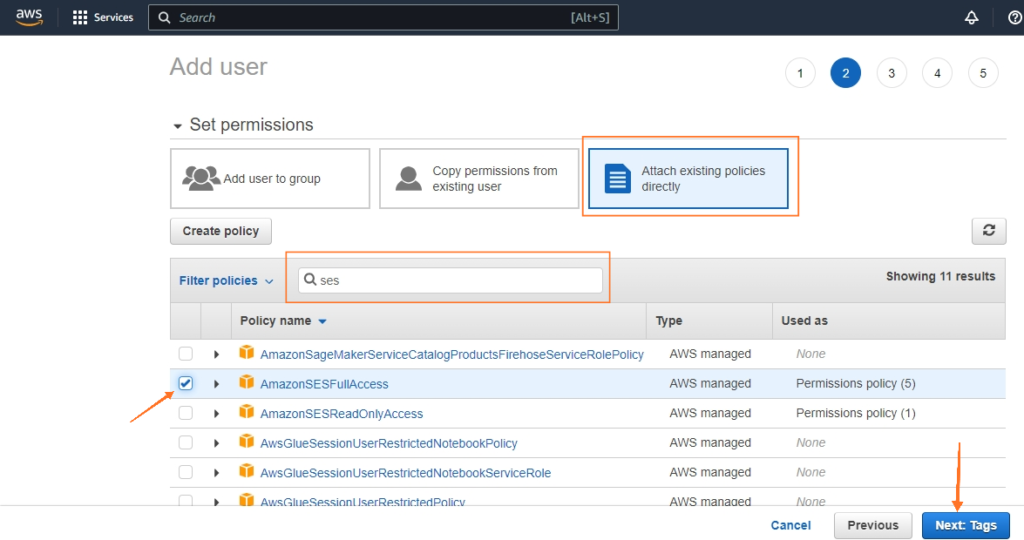
- select Attach existing policies directly and search for ses full access and select ‘AmazonSESFullAccess’
- Click next
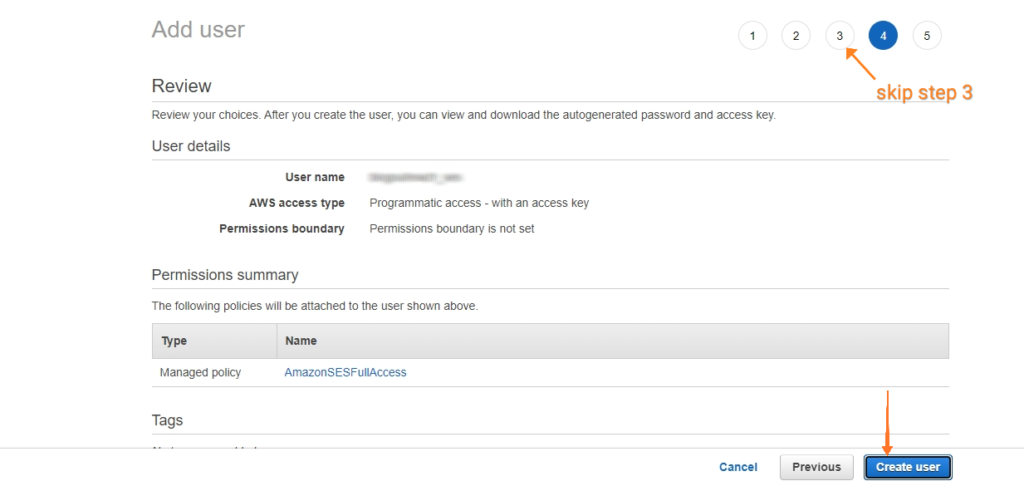
- Click next to skip step 3
- And in step 4 click ‘Create User’
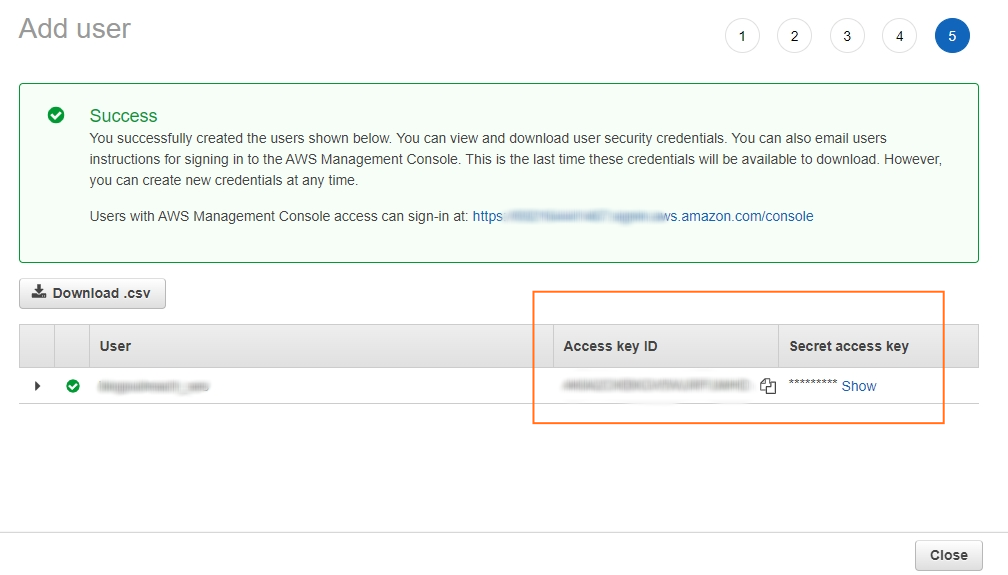
- After successful creation, copy Access key ID and Secret access key
Step 5: Email Configuration in Mautic
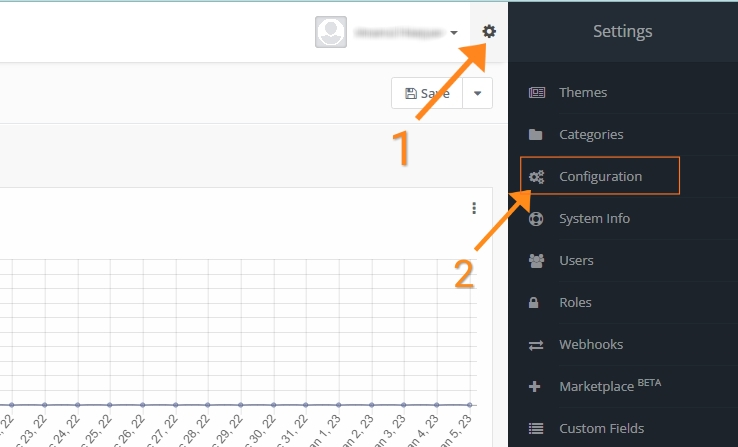
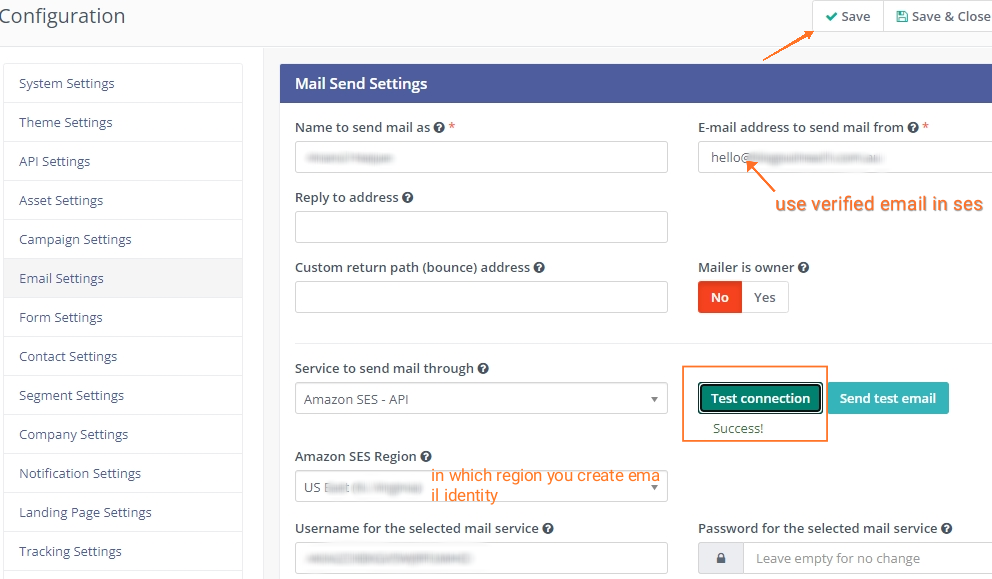
- In Mautic dashboard click settings and then click ‘Configuration’
- Click on ‘Email Settings’ and fill the required field
- And click save

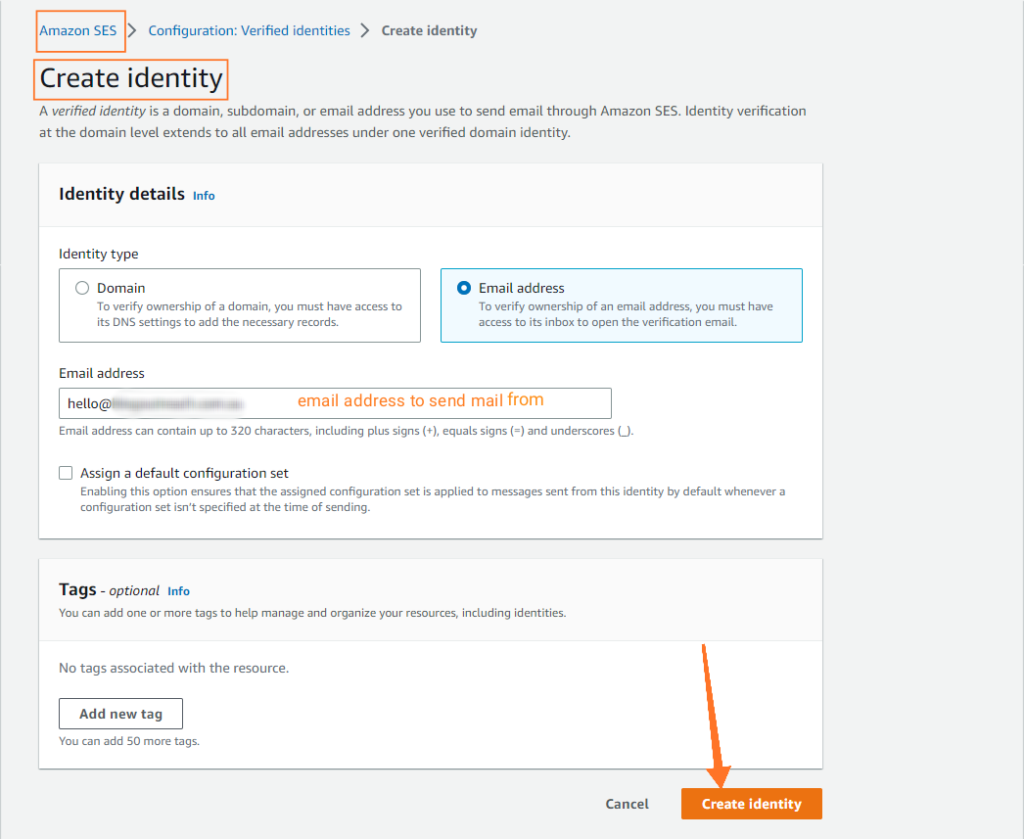
- Create an identity in AWS SES
- select an Email address and give the same email that you used in mautic to send emails from
- Next click create identity
- open this email and click the link to activate
- save and click Test connection to test
Step 6: Schedule Task Definations
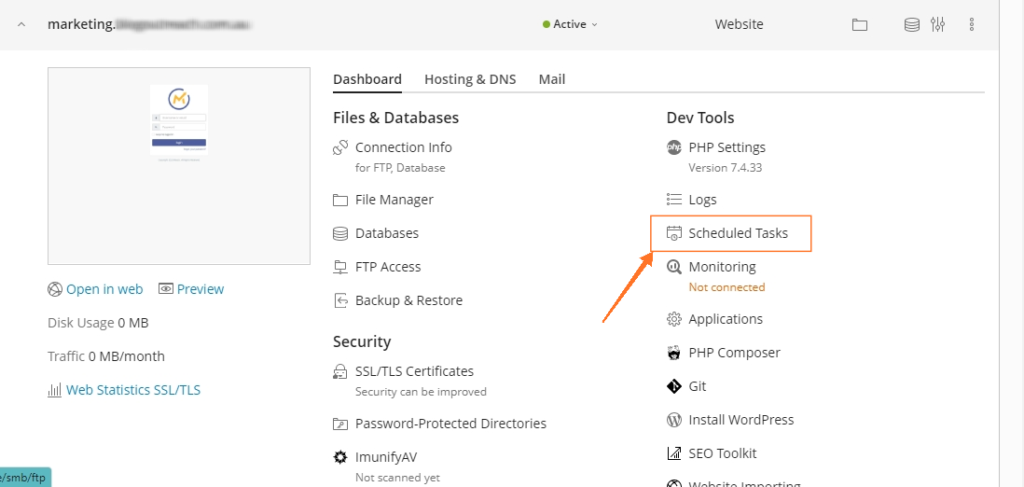
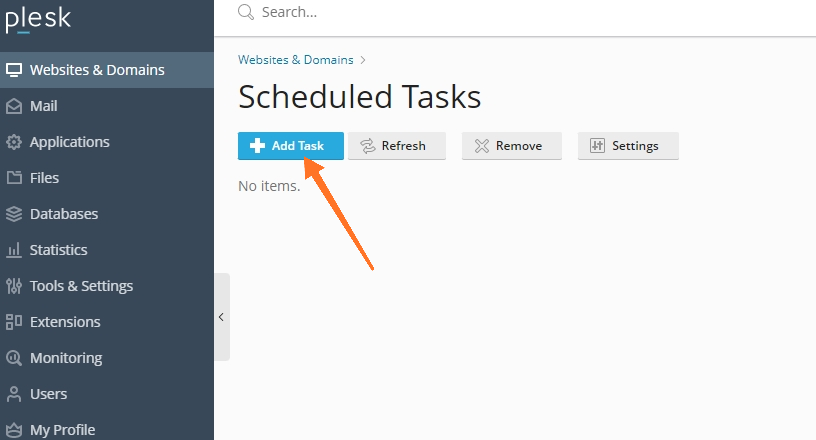
- In plesk dashboard click scheduled Tasks
- Then click ‘Add Task’
Tasks:
-
- Command: /opt/plesk/php/7.4/bin/php /var/www/vhosts/marketing.yourdomain.com/httpdocs/bin/console mautic:segment:update –batch-limit=900
- Run: 0,15,30,45 * * * *
-
- Command: /opt/plesk/php/7.4/bin/php /var/www/vhosts/marketing.yourdomain.com/httpdocs/bin/console mautic:campaigns:trigger
- Run: 10,25,40,55 * * * *
-
- Command: /opt/plesk/php/7.4/bin/php /var/www/vhosts/marketing.yourdomain.com/httpdocs/bin/console mautic:broadcast:send
- Run: 12,27,42,57 * * * *
-
- Command: /opt/plesk/php/7.4/bin/php /var/www/vhosts/marketing.yourdomain.com/httpdocs/bin/console mautic:emails:send
- Run: 13,28,43,58 * * * *
-
- Command: /opt/plesk/php/7.4/bin/php /var/www/vhosts/marketing.yourdomain.com/httpdocs/bin/console mautic:campaigns:update –batch-limit=100
- Run: 5,20,35,50 * * * *
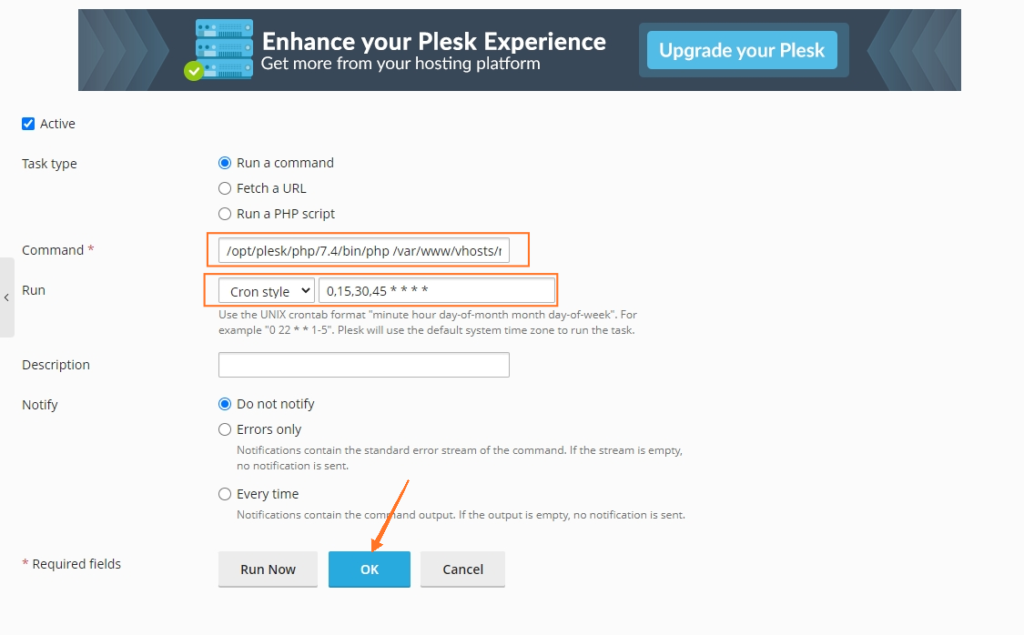
- Add these 5 tasks one by one
- after adding you can check the setup by sending a email from mautic
- setup finished.